Thursday, October 24, 2013

Loom Controlled Shibori Chenille Scarf with Heat Set Pleats

In the Sept/Oct 2011 issue of Handwoven Magazine there is a draft for a dress woven with chenille with heat set pleats.  I have never woven with chenille (it intimidates me)  but in my stash was a skein that was perfect for making this project.  I used the draft to make a scarf, not the whole dress.  The scarf is woven in plain weave, but the gathering threads follow an eight shaft twill pattern.  Four picks plain weave, one pick gathering thread.  The warp is a rayon chenille, the weft is poly machine embroidery thread.  Pretty slow weaving.

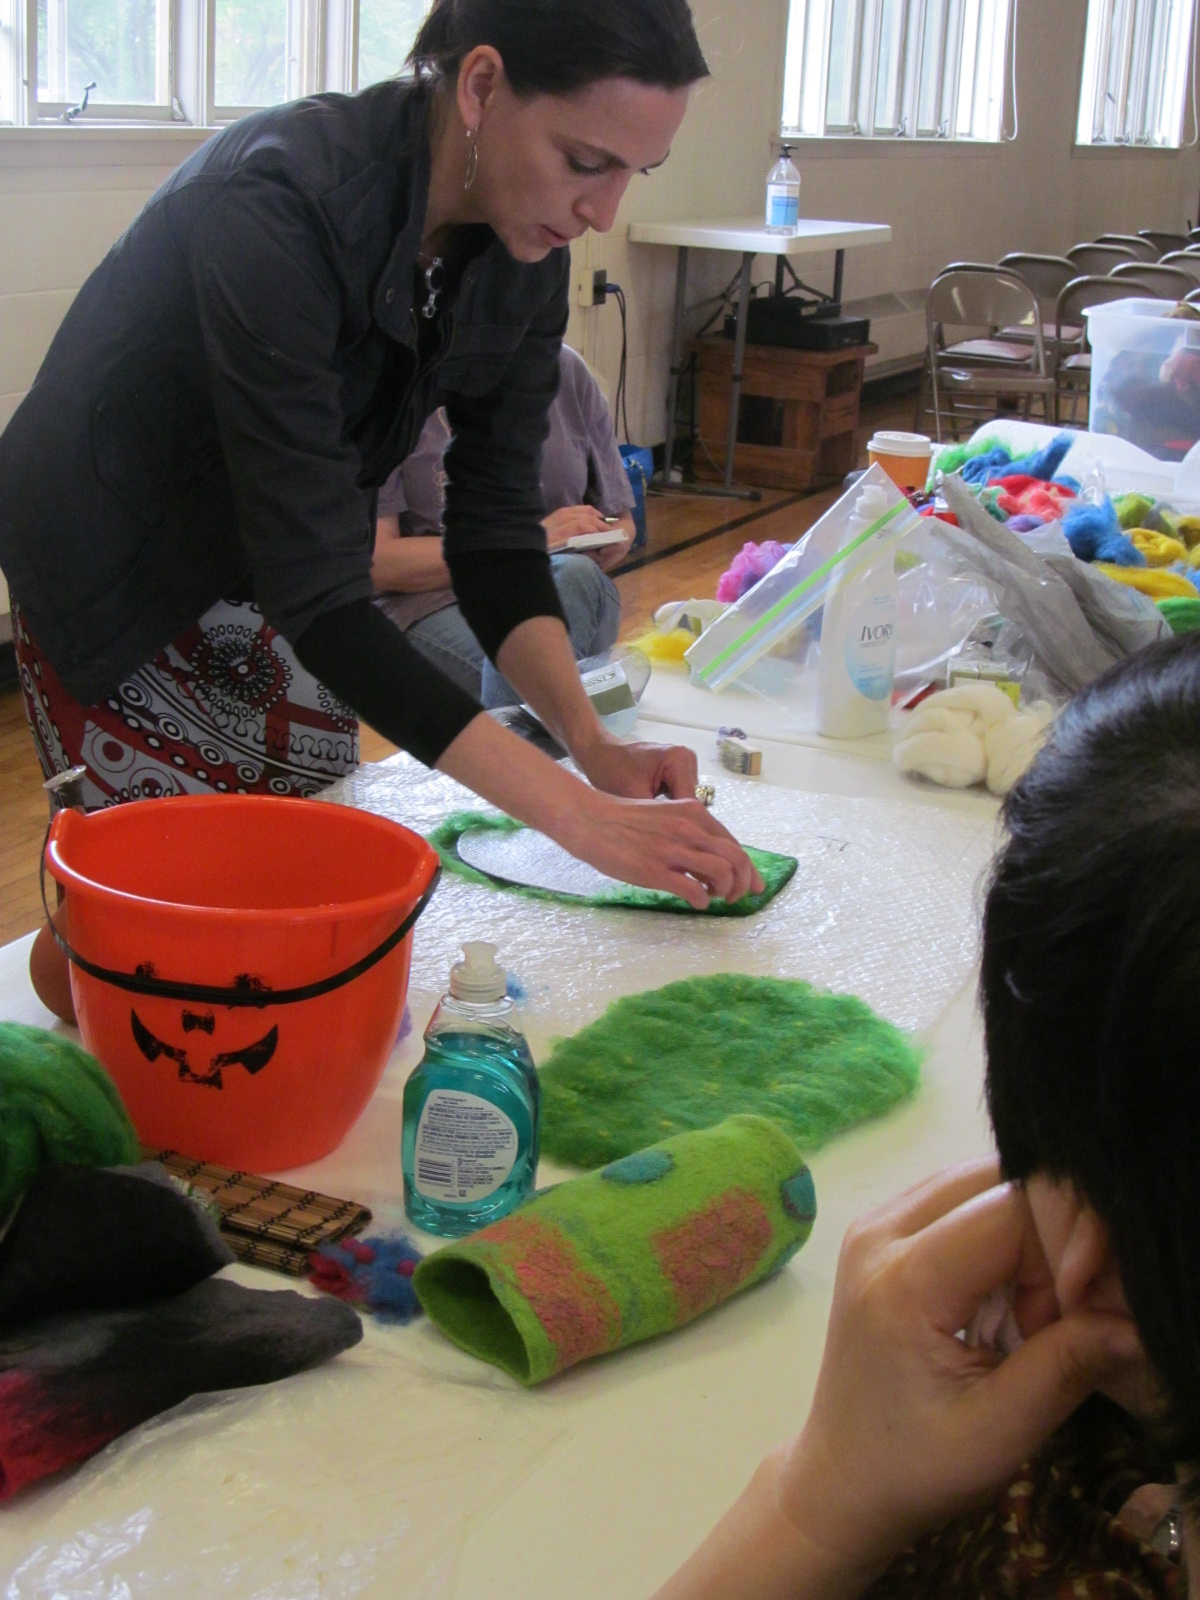
These pictures show the scarf after I took it off the loom, and the pleating and tying.


After all the threads were gathered and tied, the scarf was steamed for 30 minutes.
I let it dry, which took forever, and then started removing the supplemental threads.  One of the threads had broken when I was knotting the threads and although it didn't look like it would cause a problem, there was a definite flat spot in the scarf.  ARGHH
                                                                                                                                                                                 
repair gathers.
 I thought about it for a few weeks, and then decided to try to repleat the flat spot.  Using a needle and thread I regathered the flat area and the space around it, pulled it all tight, then steamed the spot over a tea kettle.

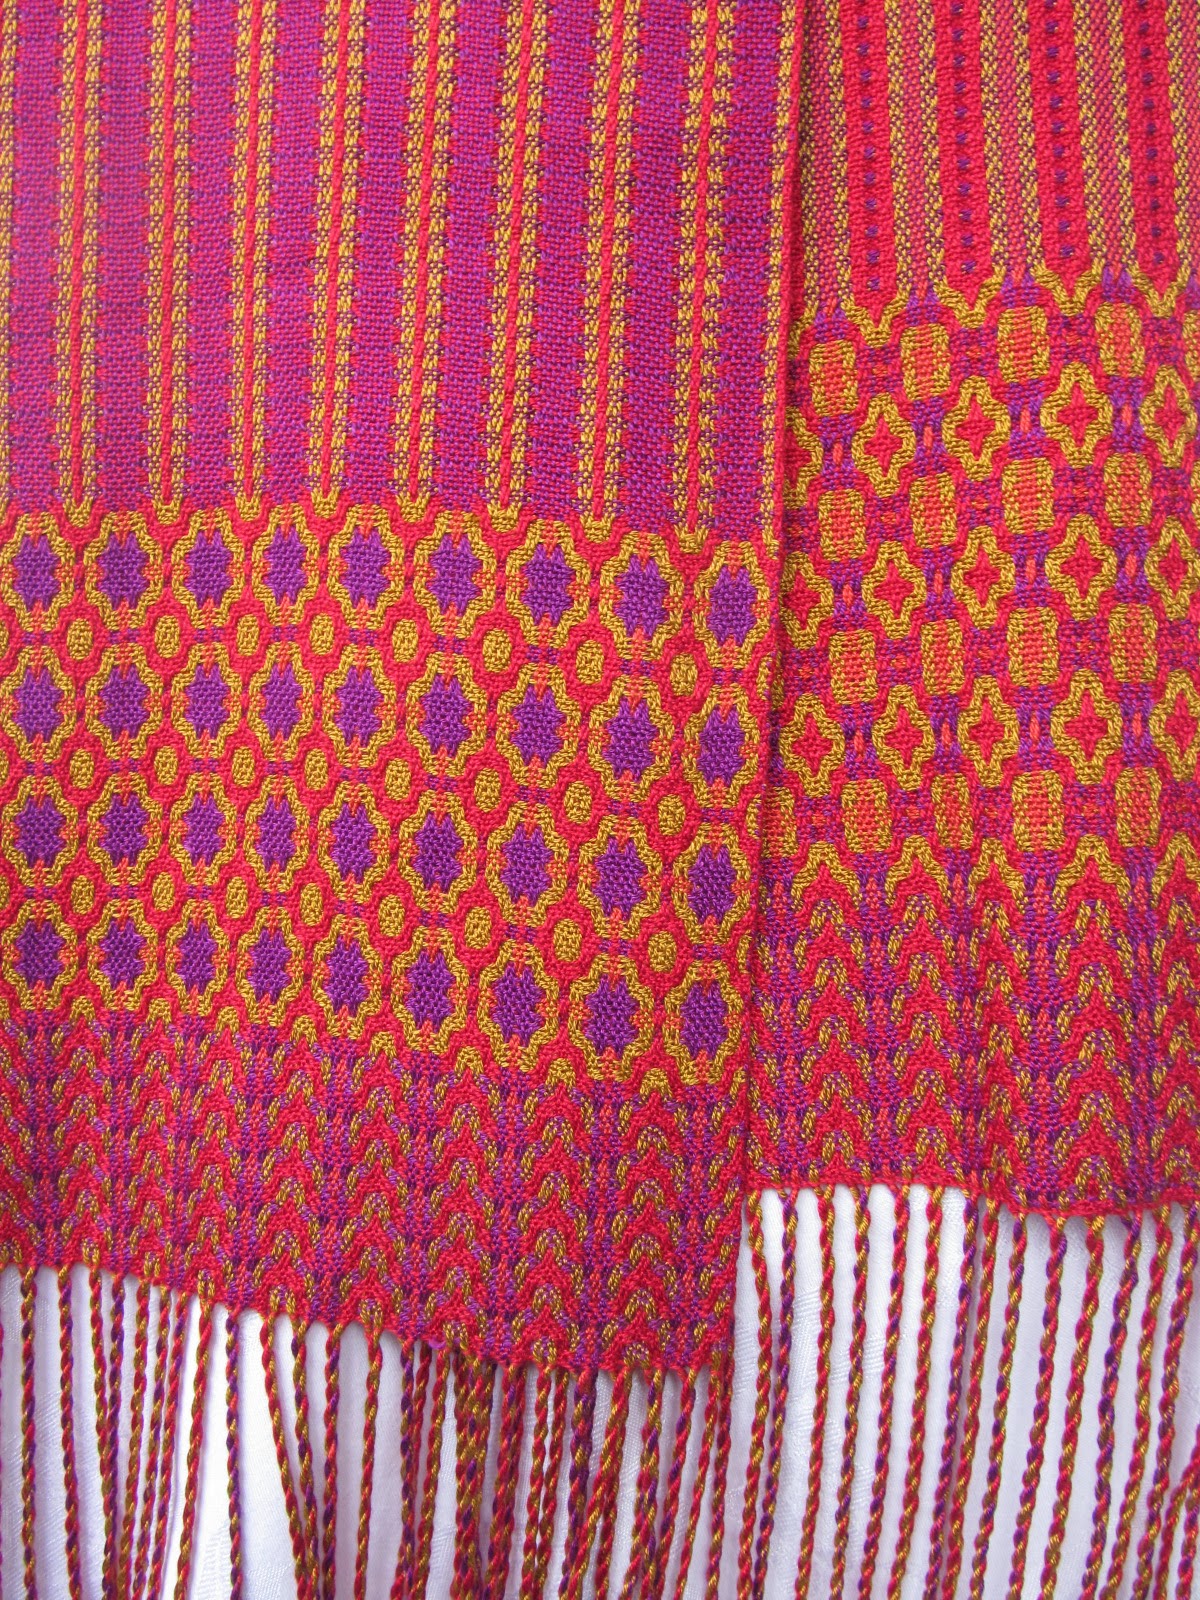
  It worked!  The flat spot is gone, the scarf is soft and lush.  You can't put this scarf in the dryer as you would with a flat chenille scarf or your pleats would relax, so it doesn't have quite the same surface that most chenille scarves have.   I am  also worried that the tails will worm over time.  There was enough warp for two scarves on the loom and the second one is just a plain weave chenille scarf.  I twisted the tails 30 times in one direction with 3 strands in each side and they still wormed.  I have been told to only use 4 strands total and twist 50 times.  Sooooo,  I will untie and retwist, again.  I have already done it twice and it is still wrong.


Sunday, July 21, 2013

Collaged Nuno Felt Scarf

I haven't posted in a while, but have been keeping busy.  I did a weaving demo at the Farmers Market in Perry, and did a sale at the Chalk Art Festival.  The weather has been brutally hot and humid for a while now which tends to rob you of your ambition.  I finally went down into the damp, musty, but cool basement and worked on a nuno felt piece.  When you have too many ideas and limited time it can be so difficult to decide where to start.  My usual process is to dump everything out of its bin onto the work table and start putting this with that.  After wasting an hour or two doing some planning, it is usually time to leave the basement and make dinner.  This scarf was laid out for several days before I was able to get back down and felt it.  It took quite a while to get it all to stay together and full.  The fabric started out as a silk chiffon skirt, cut on the bias, with a bias ruffle at the bottom in a coordinating color.  I cut it up, added some other bits and pieces and then started adding the wool.

 I added some silk roving and then put the wool over it.  The side facing down will be the front side of the scarf.
 All laid out and ready to felt.  I left the silk ruffle from the bottom of the skirt intact and used it to put a ruffled edge on the scarf.
 Finished product with an awesome vintage button and felted spiral loop fastener.

Sunday, May 26, 2013

My First Handspun Yarn

I bought a spinning wheel, a single treadle Kiwi, at the flea market a few years ago.  It was only $45 and didn't need anything but a new belt.  Well, it sat for a long time until I finally decided to take a beginning spinning class.  It was only one session, but I learned enough to give it a try at home, with the help of a beginners book.  I practiced with a lot of crummy roving and batts that I had picked up here and there to use for felting, and I could spin it, but it made some ugly singles.  Then I worked with some gorgeous Romney batts, from a fleece I bought several years ago, that went much better.  At the Shepards Market in Rush a few weeks ago, I finally bought six ounces of  good spinning wool. Here is my final result.  It isn't perfect, but it stays together and is knit-able.  I am going to make something for myself for a change, it isn't good enough to sell! The spinning process is enjoyable and I have always admired the spinners who make it all look so easy, so I will keep working on it. Some hand dyed roving is my next project, but it handles so much differently than the batt...

Thursday, May 16, 2013

Felted Vessel Workshop with Andrea Graham

Last week I had the opportunity to participate in a felting workshop with Andrea Graham.  We learned to make seamless felted vessels and how to make pre-felts and use them to incorporate marbles, fins, spikes, and other items into the surface of our vessel.  I took lots of pictures that show the process, which can translate to hats, bags, or whatever you want to make with felted wool.


The colors of wool I selected to work with, from Harrisville Design.


Laying out the pre-felt


The pre-felt cut and wrapped around marbles to
create surface designs.
Laying out the inner layer of wool


Layout of fins with a resist inside.
Layout completed.
 
Layout after wetting and rubbing
and rubbing, and rubbing...


Andrea demonstrating the use of a resist
to make a seamless vessel.
My finished piece, incorporating a long
spike that goes around the vessel and
through a loop, marbles, pom poms,
tufts of silk fibers, locks, fins, and a
strip of silk that holds a leaf bead.


The finished vessels from the class.


I really enjoyed this workshop and could not believe how each person in the class had such a unique vision for their vessel.  After my piece dried, I steamed it, shaved it, and hung a little stone leaf from the strip of silk hanging from the front.  I am anxious to get into my studio and experiment with these techniques some more.  

Thursday, April 25, 2013

New Items for Mayday Underground

 Here are a few pics of some of the items I finished this week in time for Mayday.  The necklace is a little sterling silver and mother of pearl guitar that I found at the Bouckeville Antique Sale last summer.  The chain is silver and includes mop beads and blue kyanite. 

The shawl in the center is made with hand dyed yarn by my friend Sarah at Propanicus Moon.  She also designed the pattern called The Nearly Mindless Shawl.  http://propanicusmoon.etsy.com  It must be nearly mindless if I can pull it off.  I am not the worlds most focused knitter, the pattern is available on Ravelry.   http://www.ravelry.com/patterns/library/nearly-mindless-shawl


The third piece is a nuno felt scarf.  I was doing a little experimentation, trying to add three dimensional forms to the surface.  I ended up with this funky flowered thing.  I added lots of seed beads to the centers of the flowers to give it a little bling. 


Mayday Underground Show

This is the postcard for the upcoming Mayday Underground Show in Rochester.  In the top right corner is a photo of my handwoven tencel scarf.  The show is April 27th at the Village Gate Atrium.  I have made a lot of new things for the show, and the weather is looking good.  I always have a great time at these shows, unique items and friendly vendors.

Thursday, April 18, 2013

Beaded Necklace

I I finished this necklace today. I have been thinking about it and dreading it for a long time. There was a lot of do-over, this being my most complicated piece to date. The chalcedony briolettes have been hanging around for a while and this necklace design seemed just the thing. The red beads are garnets and they really warm up the piece. I will put it out for sale at the Mayday Underground Show next Saturday, but  have no idea how to price it.  You can't factor pain and suffering into the final price.

Nuno Felt Salvage

I was attempting to make a nuno felt spiral scarf, but I goofed and went around too many times and ended up with a ten foot long scarf. Pretty, but who wants to wrap a scarf around their neck five or six times. Today I cut it in half and stitched it back together with some beads as the point of attachment. I think it is salvaged, but sometimes happy accidents are a whole lot more work than doing it right the first time. The pictures show the ice dyed silk, the scarf at 10' and the finished product.

Wednesday, April 17, 2013

Tri Loom Capelet

I recently purchased a 3' Tri Loom. I have a seven foot tri loom that I use often, but wanted a smaller one that would weave up more quickly. I can weave one of these three footers in a day, but fringing adds quite a bit of time. This little shawl is all done in neutral colors and loosely woven for summer weight. The pink color isn't quite that pink in real life, it didn't appear pink at all before I wove it in, it turned pink in relation to the other neutrals. The shawl wove up quickly using a twill weave, but then I decided to do a knotted fringe. What was I thinking??? It took longer to attach the fringe and tie all these knots than it took to weave the shawl. Not that I am unhappy with the result, but may think long and hard before doing this again. The little shawl pin is made from a vintage mother of pearl belt buckle.   I sawed the bar out of the center, sanded the edges, and made a little pin to hold it.  This probably won't make it to the etsy store yet, the Mayday Underground Show is less than two weeks away and I may not take the time to do the listing until after the show. I like these little capelets, but now I want a 5' tri loom, too!

Thursday, April 11, 2013

Change of Venue

Posterous is shutting down soon so my blog is now here on Blogger. I moved some of my old posts over here, but ditched quite a few. I think this new format is easier for me to understand and I am happy to be here.

Monday, March 11, 2013

Collaged Nuno Felt Scarflet

These are pictures of the process used to nuno felt a scarf with multiple pieces of upcycled silk.  The printed silk is an upcycled blouse and lining and it is a crinkled silk, there are also some pieces of a brown bubbled texture silk from my stash. 
   I cut the silk up into sections and laid it all out on my bubble wrap.  Little bits of ribbon and strips of torn silk are used to embellish the surface.  Using hand carders, I  blended multiple shades of green and brown merino wool and used it as a sort of glue to hold all the silk together.  The textured silks are notoriously hard to felt through so you just have to keep rolling and working it until the fibers migrate through the silk.  Using lukewarm soapy water, Not Hot, works best, but in my basement things get cold very quickly.  I usually have to rub by hand quite a bit to provide some wamth to get the fibers to move.
When all the fibers are laid out I wet everything down with warm soapy water, (I use Dawn dish soap) and lay some tulle over the top to hold everything in place.  I rub all over with my hand wrapped in a plastic bag to keep things sliding smoothly.  I remove the tulle and cover the work with a piece of clear plastic, press all the air bubbles out, and roll up in the bubble wrap or pool cover.  I roll about 600 times, open it up and check it. Adjust anything that has moved out of position, re-cover with plastic and roll from the other end.  600  more rolls, check again.  Depending on your silk, wool, temperature, etc. you may have to roll more.  When the fibers have begun to stick together and migrate through the silk you can move on to the next phase.  I usually get some warm soapy water and start working the piece by hand making sure that all of the wool is attaching to the silk properly.  I use the flat of my hand and wet each section with the warm water just before I rub it gently against the bubble surface.  I have to do it this way because the basement is so cold.  When I am sure that everything is attaching properly I start to full the piece.   I put the scarf into a basin with warm water and then gently squeeze about 20 times.  Open up and check it and then repeat.  If everything is ok, I  start throwing the piece, gently at first then gradually increasing the intensity.  Every twenty throws check the piece to make sure it isn't sticking together in the wrong places.  Keep warming the silk in the basin as it cools off.  I throw the wool until it is fulled firmly, strong enough that it won't pull apart with use.  I snipped lots of holes in the wool to give this scarflet a little more surface interest.  Just snip a little hole, then rub with your finger to form the hole and reseal the edges.  Continue to full after the holes are cut to make sure you don't have any freshly cut edges remaining.  Rinse the piece thoroughly and give it a soak in a mild vinegar solution to reverse the alkalinity of the soap solution.  I always soak my pieces in Eucalon when they are finished to soften and make them smell nice.

Letchworth Arts and Crafts Show

I finally bought a new camera a few weeks ago and just today took the time to put the disk in and learn how to use it. It has a lot more bells and whistles than my old camera so it may take some time to get used to it. Hopefully my picture quality will improve eventually. The Letchworth Arts and Crafts Show took place in Letchworth State Park over Columbus Day weekend. This was my sixth year participating in the show and the weather gods weren't too kind. Saturday afternoon was spent holding on to the tent so it didn't lift off, Sunday no wind, but rain all afternoon. Monday was ok. Sales were slower than last year, but attendance was down due to the hideous weather. I heard that Saturday alone was down by 10,000 shoppers, luckily the serious buyers still come out. I won Best of Show for a deflected doubleweave scarf that was woven using a draft from the Ruby Leslie workshop I took a few years ago. It was one of the hardest projects I have ever woven. Weaving two layers is hard enough but alternating four shuttles with different colors and carrying all those threads up the sides without making an ugly selvedge is quite challenging. There are two scarves from the warp, the winner, with three different patterns, and the second one has the same pattern throughout.
Tomorrow morning Sarah, Pam, and I are off to the Hudson Valley for the New York State Sheep and Wool Festival. We are driving down Friday in the hopes of avoiding the traffic jam at the bridge crossing the Hudson River. Every year we sit for an hour waiting to go the last two miles. We will cross the river and spend the night in Hudson NY, then drive to Rhinebeck early in the morning. Keeping our fingers crossed that this will work out better, and looking forward to exploring Hudson. Sarah says there is a good Mexican Restaurant there, and that always sounds good to me.


Double Weave Honeycomb Progress Report


Upon completing the threading for this project I couldn't wait to get started weaving. I started with with the dark green chenille, but it just didn't look right. I emailed Madelyn Van Der Hoogt who had designed the blanket and published it in Handwoven in 1995, and she gave me some advice. The dark green chenille contrasted too sharply with the natural cotton warp. It just wasn't visually pleasing with all those white threads laying over the chenille weft. Searching online, I finally found some of the heavyweight natural color cotton chenille at I Love Yarn.  http://www.iloveyarn.com/  The owner said he would be able to send it in about a week, which turned into three weeks, but I was so relieved to find the right stuff, waiting was fine. So after some fits, lots of cutting out and starting over, the blanket is finally underway. There have been some problems with loose warp threads and broken warps on the right edge, but with almost 2000 ends, I expected some problems. There was one (yes, only 1) threading error and 1 sleying error. I finally found some instructions on-line to make a simple temple here http://www.woolgatherers.com/id105.htm    and that seems to have solved the fraying problem. The weaving is a little slow, four weft colors, and the chenille between each color means changing shuttles often. As a short person, weaving a wide piece can take longer because all the leaning from side to side is tiring. The first pic shows the blanket in progress with the little paperclip temple in the lower left corner, the other picture shows the first attempt that didn't work.

Weaving Update

I am almost at the halfway point of threading this doubleweave blanket. Threading about an hour or two a day, eventually it will get done. Between painting a bedroom and trying to get the spring yard work done, there are not enough hours in the day. This week brought three sales on my etsy store, that's a record! There are never any small boxes around for mailing so I finally ordered some on-line. Of course they didn't come in time for these packages. The last two sales were mailed out in boxes constructed from larger boxes and they weren't pretty. Recycling is my preference, but the time that was wasted trying to make a box was stressing me out. The etsy blogs talk about the importance of branding, and packaging is an important part of the appearance you make to the public. This year I will try to work on that, because professional looking packaging is essential to that all important first impression.

Going on the Loom

After about three years sitting in a closet, this warp is finally going on the loom. It is the warp for a doubleweave honeycomb blanket and has about 2000 ends. This design by Sharon Alderman is in an old issue of Handwoven, and I love the look of it. Honeycomb is usually a one sided fabric because of the long floats on one side. Sharon designed this blanket as a doubleweave so that the floats are in the center between two layers of cloth that you weave simultaneously. The fluffy chenille strips hold the two layers together at intervals. Because you are weaving in two layers, you have twice as many warp threads, and twice as many picks. You throw the shuttle for one layer, change the shed and throw the shuttle for the second layer. This will probably be the most difficult thing I have woven to date. I will have to be careful to keep a good clean shed so that the weft picks end up in the correct layers. Any mistakes will probably have to be repaired by hand when it comes off the loom. The first picture shows  my warp spread in the raddle, tfrom the back,  the other picture shows the front before going through the reed  Took a few weeks to get this done This is an 8 harness weave and I had to count heddles to make sure I have enough on each shaft before I started threading . I think this structure would make a lovely scarf, maybe I should have tried that first. Oh well...

Felting Workshop with Marie Brate

I recently took a felting workshop at the new location of the Weaving and Fiber Arts Center of the Weavers Guild of Rochester.  This is my first class with Marie, although I have admired her work for a long time.  We made little capelets using a nuno felt technique,  Each capelet has a little felted flower embellishment, although mine isn't sewed together yet...
This is Marie's original design so I won't be making any of these to sell, but I have a nice piece to wear and enjoy, and learned a lot in the process.   We did ombre coloration which was new to me, and layed the felt out in an overlapping X pattern instead of the shingling I have always done.  It made a thin yet structurally sound piece of felted cloth.  Marie had pre-dyed all the silk gauze that we used in the class, and had serged all the edges with cotton so the stitching matched the silk.  There was a big bin of merino roving and novelty yarns to chose from and each of the classmates came up with a unique and beautiful piece.  We each made a little flower pin for a closure but they weren't finished in class, because the shaping had to dry.